
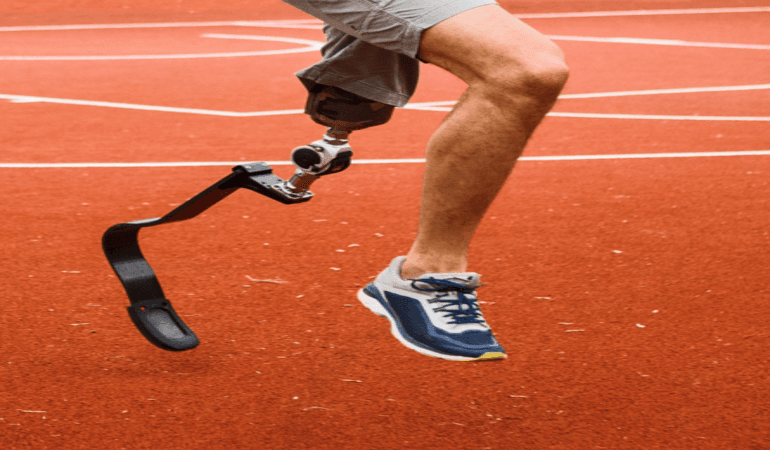
Learning how to walk with a prosthetic leg is one of the most rewarding stages of recovery after amputation - and also one that takes patience. Walking is a skill you rebuild step by step, retraining your balance, muscles and confidence to trust a new limb. This guide walks you through the whole journey, from your very first supervised stand to climbing stairs and moving over uneven Indian streets, with practical prosthetic gait training tips from the clinical team at Limbgenixx in Gwalior.
Safety first. Gait training should always be supervised by a qualified prosthetist and physiotherapist. Every residual limb, prosthesis and fitness level is different, so your programme must be progressed individually. Use the steps below to understand the journey - not as a substitute for hands-on clinical instruction. Never rush to a harder task before your care team confirms you are ready.
Before you start: fit, healing & readiness
Good walking begins long before your first step. A comfortable, well-aligned prosthetic leg and a healed residual limb are the foundation of a safe gait. Rushing this stage is the most common reason people struggle later.
Signs you are ready to begin
- Healed, shaped limb: The surgical wound is closed and the residual limb has settled in shape, so the socket fits without painful pressure points.
- Comfortable socket fit: The socket holds firmly, distributes pressure evenly and does not pinch, gap or rub. Fit is checked and refined by your prosthetist.
- Basic strength: Your hips, core and remaining limb have enough strength - built through pre-prosthetic exercises - to support standing and stepping.
- Skin tolerance: The skin over the residual limb can handle the pressure of weight-bearing without breaking down.
Whether you use a below-knee prosthesis or an above-knee prosthesis changes how walking feels. Below-knee users keep their own knee, so balance returns quicker. Above-knee users must also learn to control a prosthetic knee, which takes more time and supervised practice.
Your first steps: parallel bars & weight-shifting
Almost everyone starts between parallel bars. These give you two secure handrails so you can practise standing and stepping without fear of falling. Your physiotherapist stands close by, guiding posture and correcting alignment.
Getting used to standing and loading
Before you take a step, you learn to trust the prosthesis with your weight. Stand tall, look ahead rather than down at your feet, and keep your hips level. The key early skill is weight-shifting: gently rocking your body weight from your sound leg onto the prosthetic side and back again. This teaches your brain that the new limb can safely bear load - the heart of prosthetic leg balance.
Taking your first steps
- Small, even steps: Start with short, equal-length steps rather than long strides.
- Heel-to-toe: Aim to land on the heel and roll through to the toe, mimicking natural walking.
- Steady rhythm: Move slowly and rhythmically; speed comes later once the pattern is reliable.
- Eyes forward: Looking up keeps your posture upright and your balance centred.
As you gain control, you progress from parallel bars to a walker, then often to a cane, and eventually - for many people - to walking with no aid at all.
Building a normal walking pattern
Once you can step safely, the goal shifts to a smooth, symmetrical gait that looks and feels natural and uses less energy. This is where structured prosthetic gait training makes the biggest difference.
Elements of a good gait
- Equal step length: Both legs should take steps of roughly the same length, rather than a long sound-side step and a short prosthetic step.
- Equal timing: Spend a similar amount of time standing on each leg so you do not "hop" off the prosthesis.
- Full weight transfer: Confidently load the prosthetic side so your body moves over it, instead of leaning away.
- Relaxed arm swing: Let your arms swing naturally in opposition to your legs; this aids balance and rhythm.
Practising in front of a mirror, or with a physiotherapist counting your rhythm, helps you spot habits early. Short, frequent practice sessions work far better than a few long, tiring ones - especially in the first weeks of walking after amputation.
Walking on stairs, ramps & uneven ground
Level indoor floors are only the start. Real life in India means kerbs, thresholds, slopes, gravel and crowded footpaths. Each surface is introduced gradually, always with supervision at first.
Stairs
The classic rule is "up with the good leg, down with the prosthetic leg", always using the handrail. Below-knee users often progress to a natural step-over-step pattern, while above-knee users may take stairs one at a time unless they have a microprocessor knee that supports flexing under load. Learn stairs slowly and never carry items that block your view of the steps.
Ramps and slopes
On ramps, take shorter steps and lean slightly into the slope. Going downhill is often harder than up, because the knee must control your descent. A slight zig-zag path can make a steep slope more manageable.
Uneven and outdoor ground
- Slow down: Reduce speed on gravel, sand or broken pavement and place each foot deliberately.
- Widen your base: A slightly wider stance improves stability on uneven surfaces.
- Scan ahead: Look a few steps in front to plan foot placement rather than reacting late.
- Good footwear: Wear the shoe type your prosthesis was aligned for; changing heel height alters alignment.
Common mistakes and how to avoid them
A few habits slow progress or cause discomfort. Catching them early keeps your gait efficient and protects your joints.
- Looking down: Watching your feet throws off balance and posture. Keep your eyes on the horizon.
- Leaning on aids too long: Depending heavily on a walker delays true balance. Reduce support as your team advises.
- Uneven steps: Taking a big step with the sound leg and a tiny one with the prosthesis creates a limp. Practise equal steps.
- Holding your breath: Tension tightens your movement. Breathe steadily and stay relaxed.
- Ignoring pain or rubbing: Discomfort, redness or a socket that suddenly feels loose or tight means it is time to stop and check with your prosthetist - not to push through.
Balance, stamina & confidence tips
Walking with a prosthetic leg uses more energy than natural walking, so stamina and confidence build together over weeks. These prosthetic walking tips help you improve steadily and safely.
- Strengthen your core and hips: Strong trunk and hip muscles are the engine of good balance. Continue the exercises your physiotherapist prescribes.
- Practise standing balance: Simple exercises like weight-shifting near a stable surface build the confidence to load the prosthesis.
- Build distance gradually: Add a little more walking each day rather than exhausting yourself in one session.
- Rest and check your skin: Remove the prosthesis when resting and inspect the residual limb for redness or sore spots.
- Stay consistent: Daily short practice cements the movement pattern faster than occasional long efforts.
- Be patient with yourself: Confidence grows every time you complete a task that felt hard the week before.
Once you are comfortable indoors and out, you can explore more active goals. Newer components discussed in our guide to prosthetic innovations - such as energy-returning feet and microprocessor knees - can make walking smoother and less tiring for suitable users.
When to see your prosthetist
Your prosthetist is your partner throughout this journey, not just at delivery. Book a review if you notice any of the following, as they usually mean the fit or alignment needs adjusting:
- New or worsening pain, redness, blisters or skin breakdown on the residual limb.
- The socket suddenly feeling too loose or too tight - often a sign your limb volume has changed.
- A persistent limp, or the leg feeling too long, too short or twisted.
- Unusual noises, looseness or instability from the knee, foot or components.
- A drop in confidence or repeated stumbles despite regular practice.
Regular servicing keeps your limb safe and comfortable - see our prosthetic leg maintenance guide for day-to-day care. If you are still choosing a limb or comparing options, our overview of the types of prosthetic legs explains how different designs affect walking. With the right fit, structured gait training and a little patience, the vast majority of amputees return to confident, independent walking.
Ready to start gait training in Gwalior?
Talk to Limbgenixx prosthetists and physiotherapists - supporting patients across Madhya Pradesh and all of India.
WhatsApp Our Team Call +91 9015884467Frequently asked questions
Most below-knee users take their first supervised steps within days of receiving the prosthesis and walk independently over several weeks. Above-knee users usually need longer - often two to six months of regular gait training. Timelines vary with amputation level, fitness, residual limb health and how consistently you practise, so progress should always be paced individually with your prosthetist and physiotherapist.
The first weeks feel effortful because you are relearning balance and trusting the prosthesis to bear weight, and it uses more energy than natural walking. With a well-fitted socket and structured gait training, most people progress from parallel bars to walking aids and then to independent walking. It becomes far easier and more automatic as your muscles, balance and confidence build.
Yes. Most prosthetic users learn to manage stairs safely. The general rule is "up with the good leg first, down with the prosthetic leg first", using the handrail for support. Below-knee users often climb step-over-step, while above-knee users may take stairs one at a time unless they have a microprocessor knee that allows a more natural pattern. Always learn stairs under supervision first.
Early in rehabilitation almost everyone uses a walker or parallel bars, then progresses to a cane, and many people walk without any aid once balance and strength return. Some users - particularly older adults or above-knee amputees - continue to use a cane for confidence on uneven ground or long distances. Your prosthetist and physiotherapist will advise when it is safe to reduce support.
References & trusted sources
- Mayo Clinic — Amputation and prosthetic rehabilitation. mayoclinic.org
- NHS — Recovery and rehabilitation after limb amputation. nhs.uk
- International Society for Prosthetics and Orthotics (ISPO). ispoint.org